


Sorry for the inconvenience.
Search again what you are looking for

Reference: Piikki GA050
Hydraulic Breaker Piikki line hydraulic breaker for 10...15 t excavators. Piikki breakers are hydraulic demolition rock hammer / pecker and they are gas assisted. For many daily applications, excavation assistance, demolition etc. Very simple and reliable structure, cost effective solution you can rely on. The Piikki Series is built for versatility, daily...
Reference: Piikki Pro 250
Hydraulic Rock Breaker Piikki Pro 250 (25...40) 2300 kg Piikki Pro line hydraulic breaker for 25...40 t excavators.. Piikki Pro hydraulic rock breakers are fully hydraulically operated. For mine and quarry applications, excavation assistance, demolition, tunneling, boulder breaking, underwater etc. The membrane type breakers are fully hydraulically...
Reference: Yellow G 05
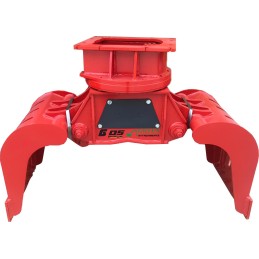
Demolition and Sorting Grapple Demolition and Handling Grapple Yellow G 05 (5…12t) (8 800 – 18 000 lb). Yellow line demolition and handling grapples designed for demolition and recycling applications. Structure of sorting grapple is light but robust which means energy savings and good productivity. Selector grabs for tough work Due to demolition and...
Reference: PB 10
Pilot boom PB for excavators Our range of PB pilot booms are designed for controlled pile installation. There can be a breaker or an auger mounted to the piling rig. Pilot Boom PB for Excavators is the ultimate solution for precise and efficient pile installation. Whether an auger or a breaker is installed to piling rig, method of movement is same. There...
Reference: Red AGR Pro 035
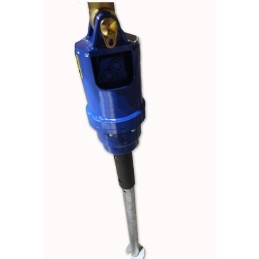
Hydraulic Auger Pro 035 AGR Pro line Hydraulic Augers for (2.0...5.0 t) excavators. AGR Pro hydraulic augers for excavators are designed for drilling holes, augers are an economical, robust solution for professionals. These earth drills can be used everywhere holes are needed by skid steer loaders, tractors, mini excavators, excavators, backhoe – loaders,...
Modern earthworks and foundation construction demand methods that are cost-effective, fast, and environmentally friendly. Traditional approaches — poured concrete footings, heavy excavation — are increasingly giving way to smarter solutions. Screw pile foundations have become one of the most reliable and versatile ways to build foundations for construction projects of every size, even in Finland's demanding ground conditions.
Light-duty screw piles can be driven by hand or with a crowbar, but on professional job sites and larger projects, real efficiency only arrives once a hydraulic earth auger mounted on an excavator enters the picture. Machine-driven installation guarantees that the helical pile reaches the required depth and load-bearing soil layer — even in the toughest ground — without unnecessary delay. A hydraulic earth drill is now the single most important tool for any modern machine contractor or house builder who wants a strong, frost-free, and instantly load-ready foundation.
In this guide, we walk step by step through how to successfully install screw piles with an earth auger, what equipment the job requires, and how to avoid the most common on-site installation mistakes.
A screw pile is a steel tube with one or more helical flights welded to its lower end. This clever design allows the pile to be screwed into the ground the same way a wood screw bites into timber. Wall thickness and diameter vary by application — from light deck piles to the heavy-duty tubes used in industrial construction.
The working principle of a screw pile is simple: the helical flight cuts its way through the soil with minimal disturbance. Once the pile reaches the correct depth, the flight anchors tightly between soil layers, giving the pile exceptional load-bearing capacity in both compression and tension. That capacity depends not just on tube thickness but, above all, on flight size and the soil layer the flight is anchored in.
Modern applications span everything from small residential projects to major infrastructure works. Screw pile foundations are the go-to choice whenever you want to avoid large-scale excavation, or when building in challenging locations such as slopes, archipelago sites, or soft clay soils.
Finland's building conditions are famously demanding. Alternating winter frost and summer heat place tough quality requirements on any foundation. The following factors explain why screw pile foundations have grown so popular:
• Frost management: Frost is the number-one enemy of foundations in Finland. When screw piles are installed correctly, the helical flight is always driven below the frost line (typically at least 1.2–1.5 m in southern Finland, deeper in the north). Because the pile's smooth shaft doesn't grip freezing soil and the flight is anchored deep down, frost heave cannot lift or shift the structure.
• Extremely fast installation: A traditional concrete foundation requires formwork, reinforcement, pouring, and days or weeks of curing. A screw pile foundation can carry load immediately after installation — framing can begin the very same day.
• Minimal earthworks and a clean site: Forget large soil exchanges, drainage work under the foundation, and heavy trucks tearing up the lawn. Screw piles are driven straight into the existing ground. The yard stays clean — a major advantage on finished properties or sensitive natural sites.
• Significant cost savings: With savings on labour hours, soil removal, transport, and materials (such as concrete), total costs typically come in well below traditional methods.
• Eco-friendliness and reusability: Steel piles leave a far smaller carbon footprint in the ground than concrete. For temporary structures, screw piles can simply be unscrewed and reused on another site, leaving the ground exactly as it was.
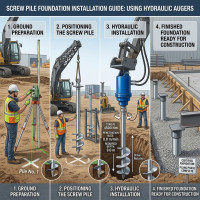
Machine-driven installation guarantees consistent quality and saves the contractor's effort. Follow these steps for a successful result on any job site.
Before starting work, determine the depth of the soft topsoil in the area and where the load-bearing soil layer begins.
1. Check the geotechnical survey report, if one is available.
2. Confirm cable and pipe locations so the auger or pile doesn't strike buried utility lines.
3. Assess obstacles such as large rocks or stumps that may require pre-drilling or relocating the pile position.
Select the pile based on the expected load and soil type.
• Light structures (decks, fences): tube diameter typically 60–75 mm.
• Heavy structures (houses, halls, solar farms): diameter 90–114 mm or more, with a wall thickness of at least 4–5 mm.
• Make sure the pile length is enough to reach below the frost line and into the load-bearing soil layer. Have extension sections ready if needed.
The size of the installation machine (such as an excavator) and the pile size determine the right hydraulic earth auger for the job. A unit with too little torque will stall mid-job, while too much torque can damage the pile head if the operator isn't careful. Choose a reliable earth drill or auger drive built to withstand continuous, slow, high-torque rotation.
To transfer the auger's rotation to the steel pile efficiently and safely, you need a quality screw pile adapter in between.
• Attach the adapter to the auger's drive shaft with a locking pin.
• Fit the adapter's lower sleeve or slot onto the top of the screw pile and make sure the connection is secure.
• A good adapter prevents the pile head from slipping and keeps the pile aligned with the auger's axis of rotation.
1. Start: Position the pile tip exactly on the pre-measured mark.
2. Alignment: Working together, the excavator operator and a ground crew member confirm the pile enters the ground perfectly plumb. Use a magnetic level attached to the side of the pile for reference.
3. Rotation: Start the hydraulic auger at a slow rotation speed. Let the machine apply gentle downward pressure — don't force it. The pile should "cut" its own path into the ground on its thread.
4. Monitoring: Watch the hydraulic system's pressure or torque reading. When torque rises sharply, that's your signal the pile has reached the load-bearing soil layer.
5. Extending: If the pile sinks all the way without meeting sufficient resistance, weld or bolt on an extension section and keep rotating.
Once the target depth is reached, check the height of every pile with a laser level. Cut the pile tops to the correct elevation with an angle grinder or pipe cutter. Finally, fit mounting caps (bracket plates) to the pile tops, to which the building's timber or steel frame will be attached.
In professional earthworks, tools need to be extremely reliable. A hydraulic earth auger offers clear advantages over other installation methods:
|
Feature |
Hydraulic Earth Auger on Excavator |
Manual Installation / Petrol-Powered Tools |
|
Torque |
Extremely high and consistent (up to several thousand Nm) |
Limited; stalls in stony or dense soil |
|
Installation accuracy |
Easy to keep plumb using the machine's boom |
Requires constant manual correction |
|
Job-site safety |
High — operator works safely from the cab |
Risk of tool kickback and hand/arm injuries |
|
Speed / efficiency |
A pile is driven in just a few minutes |
Slow, physically demanding, labour-intensive |
|
Time savings |
Dramatic — dozens of piles installed per day |
Daily output limited to a fraction of that |
Hydraulic equipment's other big advantage is versatility. The same earth auger used to drive screw piles can be switched to a conventional auger bit for other jobs on site. That makes it ideal for:
• Fence posts (pre-drilling holes in dense ground)
• Foundations and pre-drilling for post footings
• Planting (planting holes for trees and shrubs in landscaping)
• General earthworks and soil sampling
Choosing the right earth auger depends mainly on the carrier machine in use (excavator, loader, or tractor) and the size of the piles being installed. Driving screw piles calls for low rotation speed but high torque.
The pressure (bar) and flow rate (l/min) produced by the machine's hydraulics determine the torque and rotation speed the auger can deliver. Very dense clay or moraine soils need considerably more torque than sandy ground. Likewise, power requirements rise sharply as pile diameter and flight size increase.
Expert recommendation: For professional, continuous screw pile installation, we recommend at least an AGR Pro 025-class earth auger, or a larger model depending on the application, pile size, and carrier machine. This ensures the equipment is never overloaded and keeps work moving efficiently even in the most challenging ground.
Quality Green Attachments earth augers are fitted with a planetary gearbox, guaranteeing a long service life and maximum efficiency — making them an excellent choice for any screw pile installation machine setup.
The versatility of screw pile foundations makes them ideal for a huge range of projects. The most common applications include:
• Screw piles for decks and patios: perhaps the most popular use case — a fast, finished foundation without tearing up the yard.
• Screw piles for cabins and holiday homes: especially handy in archipelago locations or hard-to-reach terrain that a concrete truck simply can't access.
• Outbuildings and carports: sheds, guest cabins, and carports get a strong base in no time.
• Screw piles for fencing and noise barriers: long fence lines are completed with machine installation in a fraction of the time post-hole concreting would take.
• Industrial and hall construction: light steel-framed halls and canopies can be founded on heavy-duty screw piles.
• Screw piles for solar power plants: solar projects widely use screw piles as foundations for ground-mounted panel racking, since they install fast at scale and can be removed without a trace at the end of the project's life.
• Piers and jetties: installation is easy even from the water, or directly off the ice in winter.
• Industrial structures and signage: power line poles, road signs, and billboard frames.
Screw pile installation is straightforward, but even on a professional job site, mistakes happen when care is cut short. Here are the ten most common errors that can compromise the strength of the foundation:
1. Piles left too shallow (above the frost line): If the helical flight stays within the frost-susceptible layer, winter frost heave will lift the pile and shift the entire structure.
2. Installing out of plumb: A pile installed at an angle can't handle its intended vertical load and may fail under pressure.
3. Backing the pile out: If a pile is rotated counter-clockwise during or after installation to adjust its height, the soil under the flight loosens and the pile's bearing capacity drops significantly. Height should always be adjusted by cutting or extending the tube instead.
4. Underestimating soil bearing capacity: Stopping installation too early in soft clay, without confirming the pile has reached a hard, load-bearing layer.
5. Using too little torque: An underpowered earth auger can't drive the pile deep enough, leaving the installation half-finished.
6. Forcing a pile through rock: If a pile hits a large rock, continuing to force the rotation can break the flight, the weld seams, or the drive tool itself. When you hit an obstacle, pre-drill or relocate the pile.
7. Choosing the wrong wall thickness: A pile wall that's too thin can buckle or bend when driven into dense ground with a powerful hydraulic auger.
8. Poor adapter connection: A loose or mismatched screw pile adapter damages the pile head, weakening torque transfer and raising the risk of accidents.
9. Skipping corrosion protection: Cheap, ungalvanised or poorly hot-dip galvanised piles will rust and shorten the foundation's service life in aggressive soils.
10. Ignoring the geotechnical survey and utility maps: In the worst case, a pile severs an underground power cable or water line, causing major financial damage and a serious safety hazard.
Below are answers to the most common questions about machine-driven screw pile installation.
Yes, with the right equipment. A powerful excavator-mounted earth auger can drive a screw pile straight through frozen topsoil. In cases of extremely hard surface frost, a pilot hole can first be made with an earth drill or a hammer drill, after which pile installation continues normally down below the frost line.
A pile must always be installed at least below the local frost line (generally a minimum of 1.5 m). Beyond that, the pile needs to reach a depth where soil bearing capacity is sufficient to carry the structure's loads. In soft ground, this can mean several metres, in which case extension sections are used.
Generally, no. The beauty of a screw pile foundation is that it's a completely dry-installation method. In some demanding applications, or with larger-diameter tubes, the inside of the steel tube can be filled with concrete to add stiffness and internal corrosion resistance — but flight anchoring itself never requires concrete.
Machine installation is extremely fast. Driving a single pile takes only a few minutes, depending on the soil. A typical foundation for a detached house or a large deck (roughly 20–30 piles) is easily completed within a single working day, and framing can begin immediately afterward.
We recommend a quality hydraulic earth auger fitted with a planetary gearbox. For professional use and standard-size piles, choose at least an AGR Pro 025-class unit. Larger carrier machines and heavy-duty piles have their own, even higher-torque models available.
Small stones get pushed aside by the flight, but large boulders and bedrock will stop installation. In stony ground, pre-drilling with a suitable auger bit can help, or the pile position can be shifted slightly. Alternatively, a rock anchor pile can be anchored directly into bedrock.
During installation, the hydraulic pressure (torque) of the installation machine is monitored continuously. When pressure rises to a certain level, it's a direct indicator that the pile has reached a dense, load-bearing soil layer. Professionals often use torque meters to verify bearing capacity precisely.
Quality screw piles are made from thick-walled steel and protected with hot-dip galvanising to standard. That gives them a service life of several decades — often over 50–100 years — in typical Finnish soil conditions.
Yes. This is one of the biggest advantages of a screw pile foundation. Rotating the auger counter-clockwise lifts the pile cleanly out of the ground. If the pile is undamaged and free of corrosion, it can be reinstalled at a new site.
Machine installation saves manpower, guarantees perfect verticality, allows the use of larger, higher-capacity piles, and ensures piles can be driven through even dense soil layers to the required depth without risking a stalled job.
Screw pile installation with an earth auger is one of the most efficient methods in modern construction. It combines speed, cost-efficiency, and strength in a way traditional foundation methods rarely match. By choosing the right materials and making sure installation reaches deep enough into the load-bearing soil layer below the frost line, you build a solid foundation that will last for decades.
A successful result always comes down to the right installation equipment. A quality hydraulic earth auger paired with the right screw pile adapter turns an excavator into an efficient foundation-building machine, capable of handling even the most demanding jobs with ease.
Ready to take your job site's efficiency to the next level? Explore our extensive, professional-grade range and find the Green Attachments hydraulic earth auger that's right for your project. Contact our experts today, and we'll help you choose the perfect equipment package for your carrier machine and your needs.
Search again what you are looking for